
10 Essential
Acrylic Pour Painting Supplies
Guide for Beginners by Olga Soby
Are you just diving into fluid art and wondering which pour painting supplies you need to be successful with this fun art? Or maybe you have been working with fluid techniques for a while and now looking to try new awesome supplies and ideas? In this article, I explain everything step-by-step and will also help you make environmentally friendly choices.
And in case you are new here, my name is Olga Soby. I’m an artist and educator, and through this Art Academy (as well as YouTube channel), I provide aspiring artists with tools and knowledge they can use to master acrylic pouring and make beautiful, expressive art.
Over the years, I’ve worked with countless art supplies and materials – and through lots of trial and error, I’ve learned what truly works best. I created this guide to share my top recommendations and help you choose the right tools and supplies for your own pouring journey.
So, without further ado, let’s discuss 10 essential acrylic pour painting supplies you'll need to get started...
Acrylic Pour Painting Supplies - Guide For Beginners:
1. Best Acrylic Paint for Pouring
At the risk of stating the obvious, to create beautiful acrylic pouring artwork, you need acrylic paint. But not just any acrylic paint.
One of the most common questions beginners ask is:
“What kind of paint do I need for acrylic pouring?”
And the answer makes all the difference in your results.
When selecting paint, the most important thing is to choose student-grade (also known as academic-grade) or artist-grade acrylic paint. These higher-quality paints contain richer pigments and more durable binders, which are essential for creating vibrant, long-lasting fluid art.

❌ Avoid craft paint for acrylic pouring
While craft paint might seem like a budget-friendly option, it's inexpensive for a reason. Craft paints are typically loaded with fillers, have low pigment concentration, and use weak binders. This often leads to:
- Dull or muddy colors
- Cracking and crazing as the painting dries
- Lack of archival quality (they fade over time)
In contrast, professional or student-grade paints offer consistent performance and intense color payoff, especially when mixed with a pouring medium. These paints are also more lightfast, meaning they resist fading over time and preserve the beauty of your artwork.
What Are The Best Paint Brands For Acrylic Pouring?
Can I Use Pre-Mixed Pouring Paint?
Can I Use House Paint?

2. Pouring Medium Options
Pouring medium is a substance we add to acrylic paint to reduce its viscosity, make it more fluid, and improve flow, making it suitable for various fluid art techniques like the Dutch pour (blow-dryer technique), Swipe, Ring pour, Dirty pour, Chain pull, Flip cup, etc.
And without exaggeration, your pouring medium is incredibly important – it directly determines how your paint will behave on the canvas.
How to choose a pouring medium for fluid art?
There are 3 general categories of pouring mediums used in the acrylic pouring world:
a) Commercial Pouring Mediums
These are specially formulated products created by paint manufacturers like Liquitex, Golden, Pebeo, Amsterdam, etc. Designed specifically for acrylic pouring, these mediums are typically archival, meaning they are engineered to resist yellowing, cracking, or fading over time. Their performance is generally reliable and consistent. However, commercial pouring mediums come at a higher price point and are not always versatile. Some artists find them a bit limiting when trying to customize consistency or achieve special effects.
b) Pouring Medium Alternatives
Over time, many artists have experimented with more affordable alternatives such as Floetrol, PVA glue, and even wood varnishes. These options have become widely used in the fluid art community thanks to their low cost and accessibility. They can produce good visual results.
That said, these alternatives are not archival. They were never designed for fine art purposes and may contain additives that cause the paint to yellow, separate, or crack over time. While they can be great for learning, testing, or casual projects, they may not be ideal for creating artwork you intend to sell, gift, or preserve long-term.
c) Custom Pouring Medium Recipes
Many fluid artists develop their own pouring medium recipes by blending ingredients like commercial mediums, Floetrol, glue, water, etc. These custom recipes allow for much greater flexibility and are often tailored to suit a specific pouring style.
This approach can also be more economical and gives the artist control over consistency, drying time, and paint behavior. The archival quality of a custom recipe depends entirely on the ingredients used. A recipe that includes non-archival elements may still be prone to yellowing or degradation over time.
What Do I Use?
I’ve tested more pouring mediums and combinations than I can count – from commercial products to community-recommended recipes and everything in between. But I couldn’t find one that checked all the boxes:
- Perfect flow for thin consistency techniques like the Dutch pour, open cup, dirty pours, etc
- No cracking / crazing
- Affordable ingredients
- Archival quality to ensure my art lasts
- Promotes beautiful, consistent cell reaction.
So I went on a journey to develop my own recipe. After two years of experimentation, I succeeded with it.
I teach my full recipe, ratios, consistency, and techniques inside my Fluid Art Mastery course. And I'm proud to say that it’s been a transformative tool for thousands of artists around the world!

Olga, you are a genius! My very first attempt at creating cells with [your] mixtures, I got so many cells and my colors did not create mud or dull. I have been struggling for five months and finally decided to give the course a chance because, what did I have to lose. I could keep spinning my wheels and wasting time and money, or learn from a true mentor. My only regret is that I did not take it sooner, before I spent a lot of money on supplies. I will for sure now only buy paints and mediums on your preferred list. Thank you for creating this amazing course and for presenting it with such style, enthusiasm, and creative energy.
- Barbie J.
Why Did You Stop Using Floetrol as Your Pouring Medium?
Why Did You Stop Mixing Paint With Water Only?
What Is The Right Consistency?
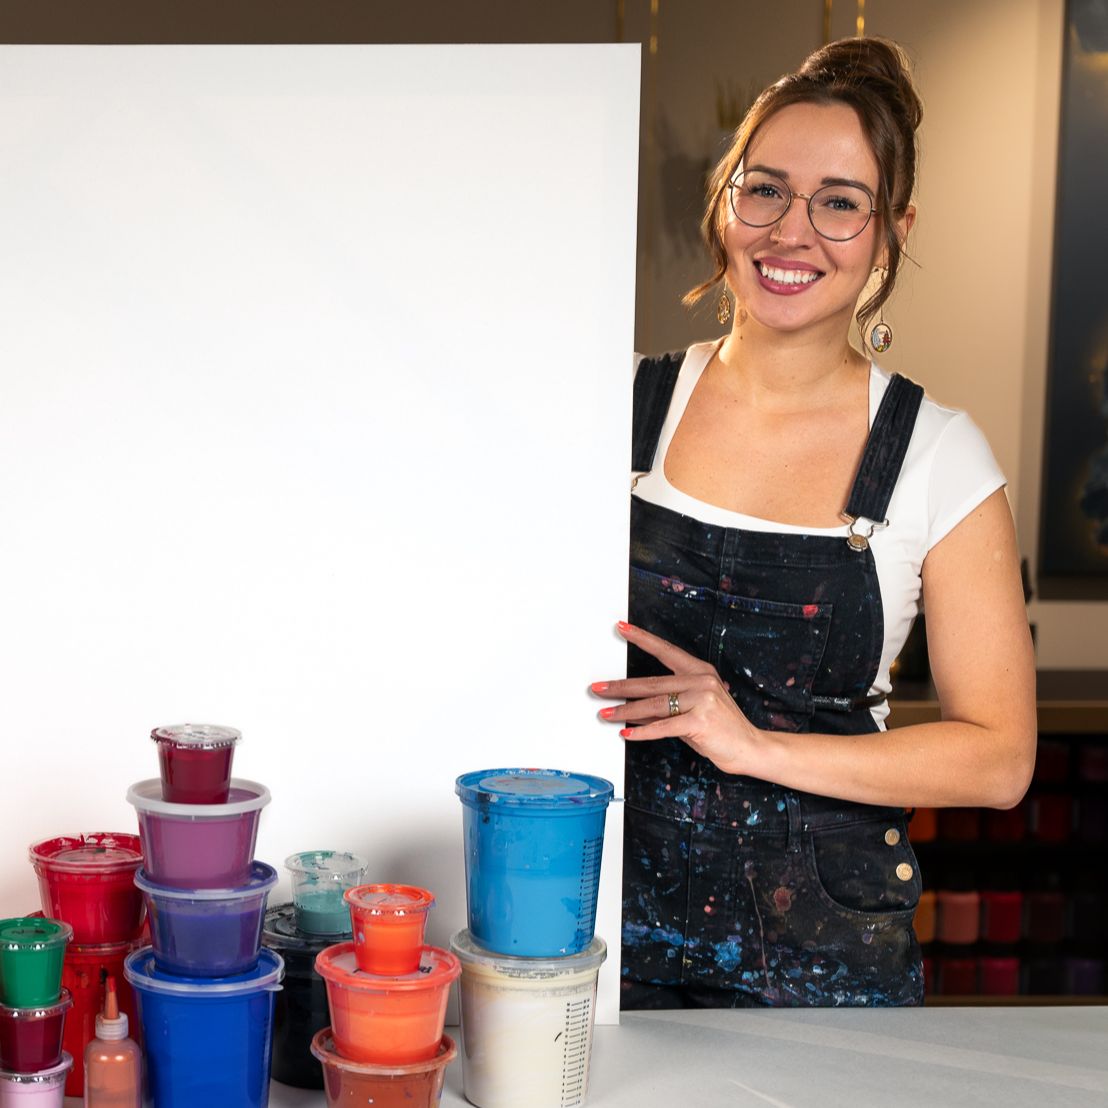
3. Pour Painting Supplies for Mixing & Storing
Cups, jars, mixing sticks – all those handy acrylic pour painting supplies are needed for mixing acrylic paint with your pouring medium recipe and storing your pouring mixture.
For stirring, use wooden craft sticks.
For cups, I recommend silicone or durable plastic cups with tight-fitting lids, which can be used for both mixing and storage. You can peel the dry paint off and reuse your eco-friendly supplies for acrylic pouring.

Paper cups are also a great option and a more biodegradable alternative to one-time-use plastic cups.
I also like to use squeeze bottles, which are another convenient way to store pre-mixed paints.
Using a Variety of Containers, Cups, and Squeeze Bottles to Pour Fluid Paint on the Canvas:


How Much Pouring Medium Do You Really Need?
That depends on the consistency you want to achieve. Different acrylic pouring techniques call for different levels of fluidity. That’s exactly why I created the Consistency Cheat Sheet—a free, easy-to-follow guide that shows you the perfect consistency for every major technique. No more guessing, no more wasted paint.

4. Best Surfaces for Fluid Art: Canvas & Wood Panels
Paints are mixed! Now we need something to pour on 😄
The most popular painting surfaces (aka substrates) for acrylic pouring are canvases and wooden panels.
I personally prefer to work on canvas. Just make sure your canvas is tightly stretched – if it’s saggy in the middle, fluid paint will pool during drying and may cause uneven texture or cracking.
Alternatively, you can pour on cradled wood panels, which offer a flatter and more stable surface.
If you go this route, make sure to seal and prime it with gesso first before painting. Unsealed wood can absorb moisture unevenly and affect how the paint dries.
Can I Pour on Tiles?
5. Canvas Stands
If you're doing acrylic pouring on canvas, elevating it is a must. A proper canvas stand ensures that excess fluid paint flows freely off the edges and helps prevent your artwork from sticking to the working surface while drying.
One of the best tools for this job is these Painter’s Pyramids – small, durable, reusable stands designed specifically to support canvases, wood panels, and other surfaces during painting and drying.
These handy tools are a game-changer for any fluid acrylic artist.

I personally use Painter’s Pyramids for all of my acrylic pour paintings. To make them even more secure, I attach them to the back of the canvas using standard push pins and a mallet. This way, the stands stay in place during tilting, blowing, or spinning – no slipping, no wobbling.
Attaching These Canvas Stands to My Canvas:
Not sure how much fluid paint you need?
Use my free tool to get the perfect amount for any canvas:
Acrylic Pouring Paint Calculator6. Torch or Heat Gun
Torch is absolutely an optional tool. It’s used by some artists for two purposes:
1. It helps to pop air bubbles that are in the paint from mixing and stirring.
2. It can help to stimulate cell creation (depending on your recipe).
I prefer using this torch to pop air bubbles.
If you’re not comfortable using a torch for acrylic pouring, a heat gun can be a good alternative. Just be cautious – the continuous hot airflow can easily push your paint around or cause it to dry too quickly before you’re finished painting.
Using Torch To Pop Air Bubbles:


7. PPE for pour painting
Safety is important. Therefore, read the MSDS of ALL the paints, mediums, and tools you are using. Follow all the safety recommendations, and use proper Personal Protective Equipment. And here are some general must-haves from me:
Fire Extinguisher – if you use a torch or heat gun, I highly recommend having one accessible in your working area.
Nitrile Gloves – it’s sure fun to have paint all over your hands. However, acrylic paints and mediums are not the most “innocent” materials out there. That is to say, it’s recommended to avoid direct skin contact. I like to reuse my gloves whenever possible to reduce waste.
Good Ventilation and Air Purifier – make sure that you have good ventilation in your working environment. Especially if you are pouring a lot in a single session and heating your pours with the torch.
8. Essential Tools for Pouring Techniques
There are endless ways to get creative with acrylic pouring, and one of the best ways to explore new effects is by using special tools. While some tools are made specifically for artists, many of the most fun and effective ones actually come from everyday household items – even beauty and kitchen supplies!
In the world of pour painting, artists have adapted all kinds of unconventional tools to create unique and eye-catching results.
Some commonly used acrylic pouring tools include cookie cutters, embroidery hoops, combs, toothpicks, straws, and silicone funnels.

Of course, one of the most popular tools is a blow dryer – perfect for techniques like the Dutch pour, where controlled air movement helps shape intricate flows and soft gradients.
You’ll find plenty of blow-dryer tutorials on my YouTube channel, especially if you love that dramatic, airy movement.
Using a Blowdryer to Create A Beautiful and Dynamic Painting:
Want more product recommendations, latest techniques, and insider fluid art secrets?
Join My Private Artist Circle (It's Free!)
Thousands of fluid artists are already mastering their art with my proven methods.
Don't miss out:
No spam, ever. Just valuable fluid art insights.
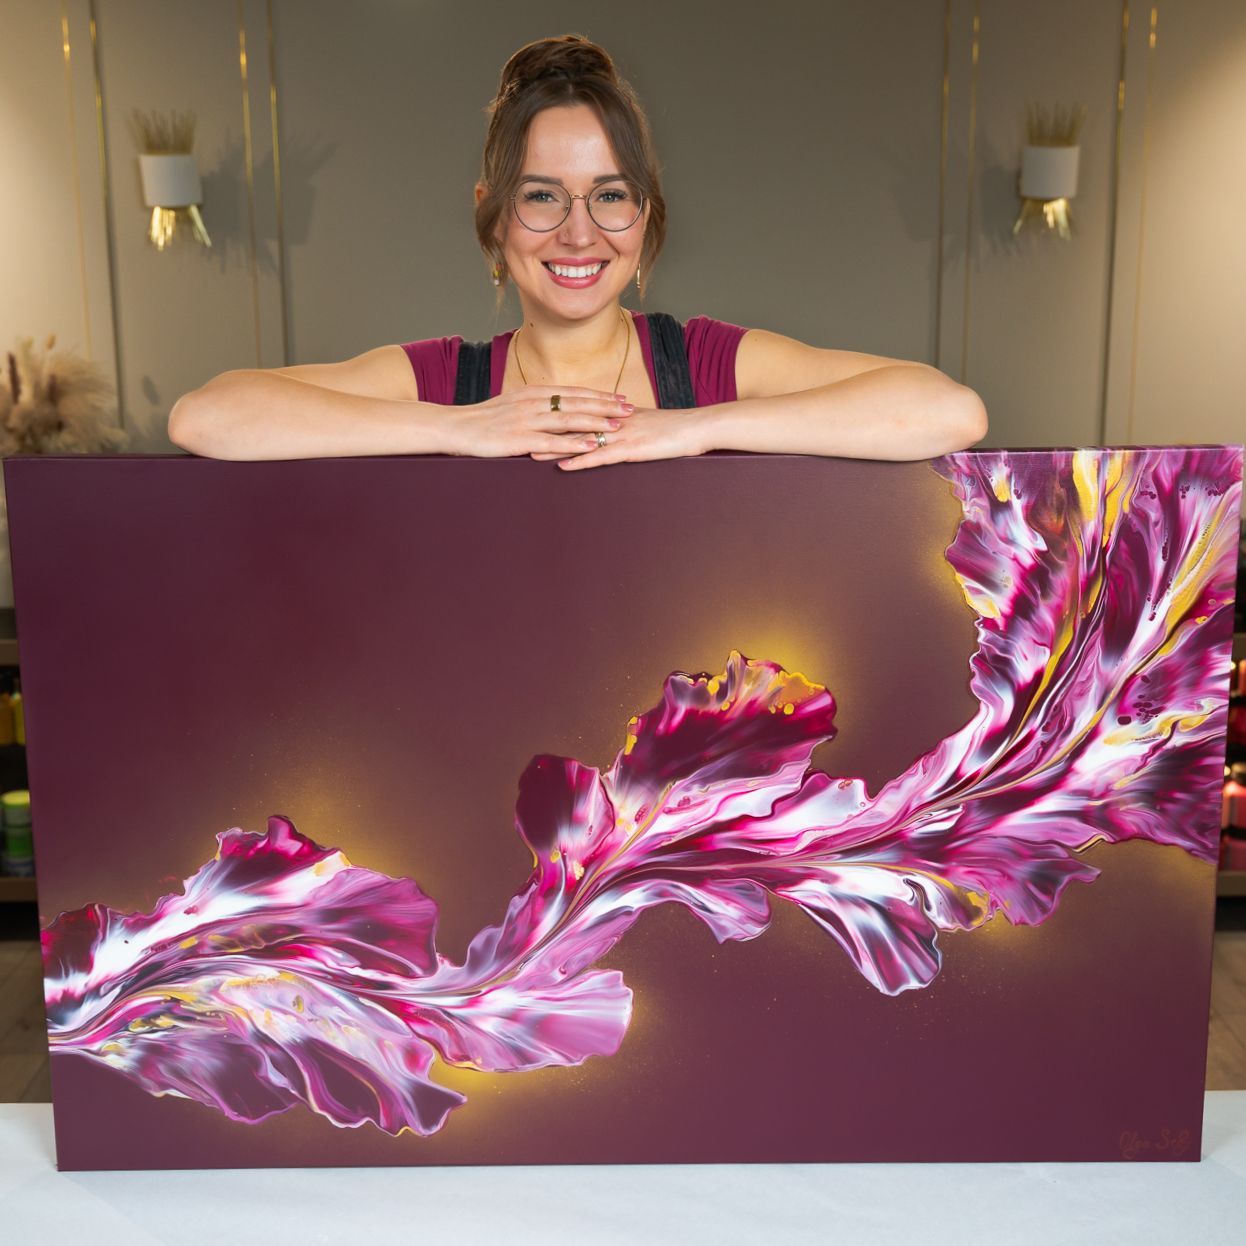
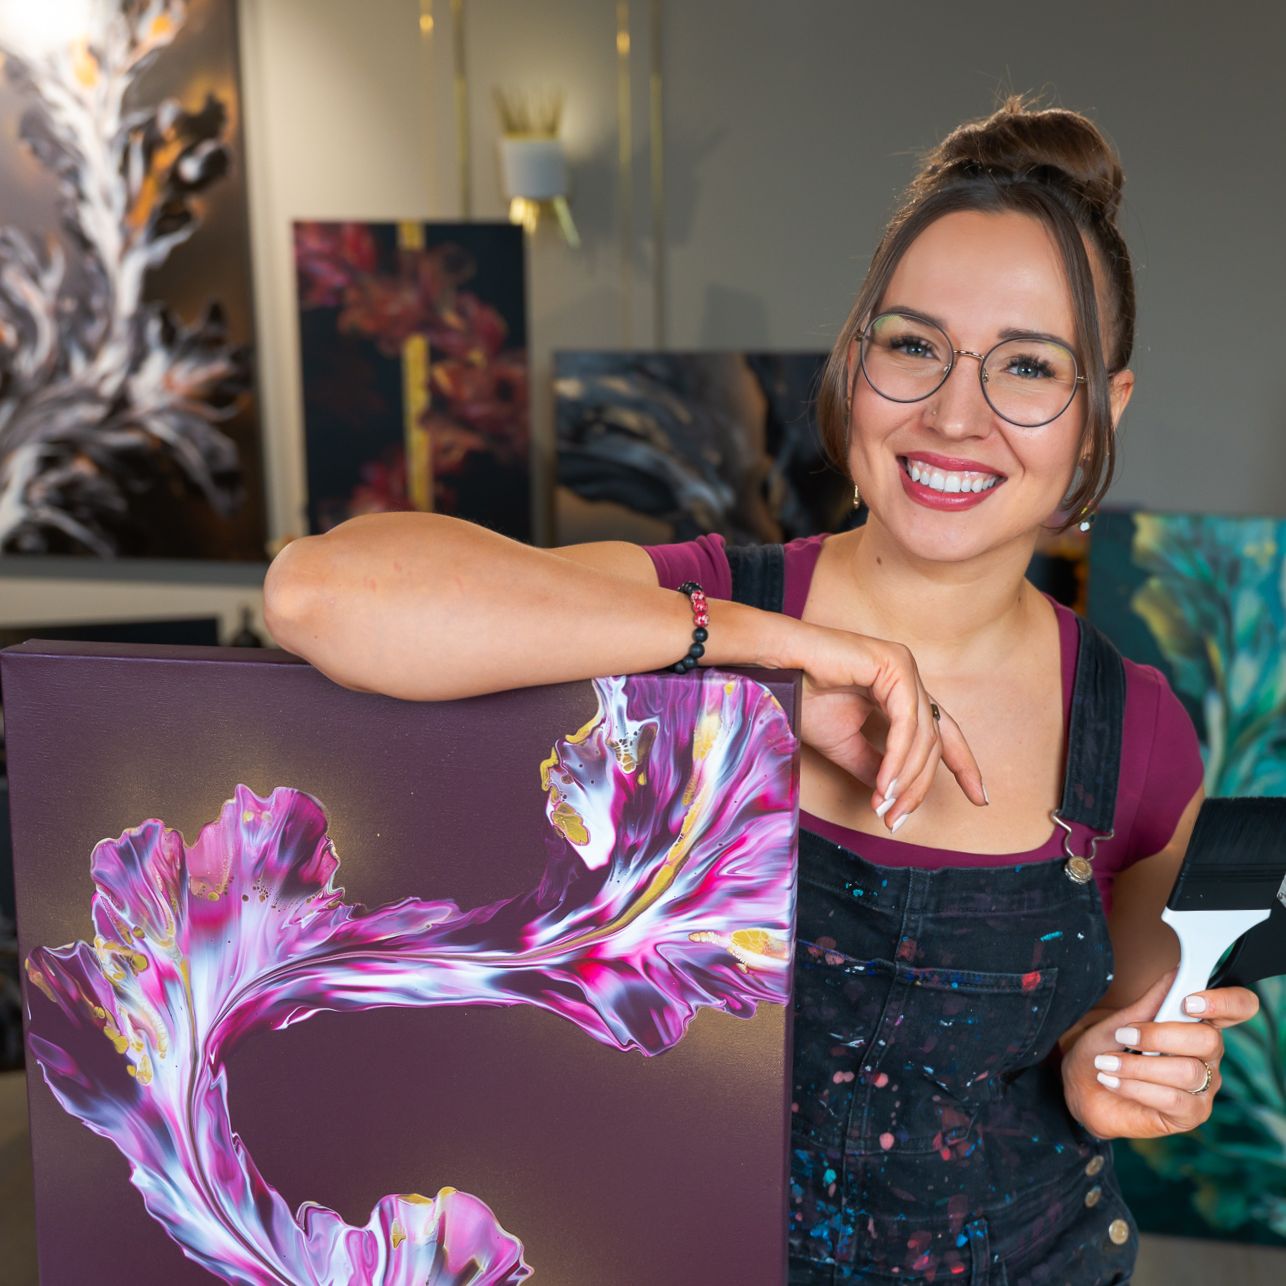
9. Embellishments
Pour painting techniques are a lot of fun, but your creativity doesn't need to stop once the paint is already on the canvas!
There are so many amazing ways to embellish a painting and make it even more beautiful and expressive! One of the ways that I love to enhance my pieces is by adding this faboulous Glowing Effect or by using stencil to add gorgeous textured Mandalas.
If you're ready to go beyond the basics, don’t miss my guide: 7 Extraordinary Supplies to Level-Up Your Fluid Paintings – where I share fun embellishment tools and techniques that can help transform your acrylic pours into true masterpieces.
10. Finish / Final Coat for Acrylic Pouring Paintings
The painting is done! It's time to finish your fluid painting with the final coat.
The finish helps preserve your artwork from dust, UV damage, and wear. It can also be used to enhance or transform the appearance of your painting. In that way, it becomes a meaningful part of the artwork itself.
For example, epoxy resin creates an ultra-glossy, glass-like surface. And varnish offers a more traditional and refined finish. It's available in a range of sheens – typically gloss, satin, and matte – each of which can dramatically influence how your artwork looks and feels.

If you've ever wondered what the real difference is between varnish sheens, how to apply varnish without brush marks or streaks, or how to master my signature dual varnish technique for stunning gallery-worthy results, I've created a comprehensive Varnish Mastery online course that covers it all. You can learn more here:
Varnish Mastery Online Course >>Example of Painting Finish With Dual Varnish Technique:
I hope this Acrylic Pour Painting Supplies Guide was helpful to you! Now have fun hunting for your new creative tools and pour painting supplies! 😀
In conclusion, I want to say: Keep experimenting, keep exploring your unique creativity, and enjoy every step of this journey!
Colorfully Yours,
Olga Soby
Share To Show Some Love:
About the Author:
Olga Soby is an internationally recognized contemporary artist and educator based in Canada, with roots in Ukraine. She specializes in fluid art and has spent years developing techniques that are both visually captivating and accessible to artists of all levels.
Her artwork is collected worldwide, and she shares her creative process with a global audience of over 1.5 million aspiring artists through her YouTube channel and social platforms.
Through Soby Art Academy, Olga is proud to offer structured, in-depth courses that guide students step-by-step — helping them gain confidence, master acrylic pouring techniques, and create artwork they truly love.
Affiliate Disclosure:
Some of the links on this page are affiliate links, which means I may earn a small commission if you choose to make a purchase – at no extra cost to you. I only recommend products I personally use and truly believe in. Your support helps me continue creating free educational content for the fluid art community.